Friday, December 31, 2010

Oh the weather outside was frightful


I don't know about you, but 20 inches of snow in less than 20 hours made me want to stay home and make soup. Accordingly, I spent part of the "Blizzard of 2010" cooking a big pot of mulligatawny. Here's the recipe, along with an additional soup recipe, for your next snowy day.


Mulligatawny Soup
(serves 6)

1/4 cup vegetable oil
3 medium onions, chopped
5 garlic cloves, chopped
2 large carrots, peeled and chopped
1/2 tablespoons garam masala
1/2 teaspoons ground coriander
1 teaspoon turmeric
1/2 teaspoon cayenne pepper
2 bay leaves
2 cups red lentils
8 cups chicken or vegetable broth
1 cup canned light unsweetened coconut milk
juice of 1 lemon
2 cups cooked basmati rice (great use for leftovers from Indian takeout)
salt and pepper

1. Heat vegetable oil in a large pot over medium-high heat. Add onions and carrots and cook until golden brown, stirring frequently, about 15 minutes. Add garlic and saute an additional two minutes.

2. Add garam masala, coriander, turmeric, and cayenne and stir to coat vegetables. Add lentils, chicken broth, and bay leaves. Bring soup to a boil and reduce heat to medium until lentils are very tender, about 20 minutes.

3. Discard bay leaves and puree soup, with an immersion blender if you have one, otherwise, in a blender, in batches, until smooth.

4. Return soup to pot. Add coconut milk, lemon juice, and rice. Season with salt and pepper to taste.


Split Pea Soup with Ham
(serves 6)

1/2 pound smoked bone-in ham (I got this at Fairway's deli counter), shredded into bite-size pieces
4 bay leaves
1 pound split peas, rinsed and picked through
1 teaspoon fresh thyme leaves
2 tablespoons olive oil
2 medium onions, chopped
2 medium carrots, peeled and chopped
2 medium celery stalks, chopped
1 tablespoon butter
2 garlic cloves, mined
1 pinch sugar
3 small new potatoes, scrubbed clean and cut into a medium dice
salt and pepper

1. Bring three quarts of water to a boil with bay leaves. Reduce heat, add split peas and thyme, and simmer until peas are tender, but not dissolved, about 45 minutes.

2. In the meantime, heat oil in a large skillet over high heat. Add onions, carrots, and celery. Sautee, stirring frequently, until vegetables begin to brown. Reduce heat to medium-low and add garlic, butter, and sugar. Cook vegetables, stirring infrequently, until vegetables are deep brown, about 3o minutes. Set aside.

3. Remove bay leaves from simmering split peas. Add cooked vegetable mix, shredded ham, and diced potatoes. Simmer until potatoes are tender, about 20 minutes more. Season with salt and pepper.

Monday, December 27, 2010

Missing in action no more

Apologies for the drought of new content, readers. I have had an incredibly busy December so far.


Between Judd's 36th birthday dinner at Uncle Vanya's in Hell's Kitchen,


my incredible spa weekend at Cal-A-Vie outside San Diego (full of healthy AND delicious spa cuisine - more to come on that later),


trimming our tree,


my, Judd's, and my sister's second annual holiday party,


Christmas dinner at my sister's house,


and most recently, a very distracting blizzard -- it's been hard to find a free moment to post -- phew!

But I am ready to get back into blogging business and have lots of restaurants and recipes to tell you about, along with a list of the best and worst places I tried in 2010. And, Judd got me a new camera to document all of my culinary adventures! So stay tuned.


In the meantime, here's the recipe for boeuf a la mode, the simple but satisfying French pot roast that we had for Christmas this year, served on top of creamy polenta with sheep's milk cheese. I have made it many times myself, and it always turns out delicious. (The leftovers are even better.)

BOEUF A LA MODE

serves 8

2 2-lb well-marbled boneless beef chuck pot roasts
2 teaspoons ground allspice
1.5 lb onions, halved lengthwise and thinly sliced
6 large garlic cloves, minced
2 tablespoons chopped fresh flat-leaf parsley
salt and pepper

1. Put oven rack to middle position and heat oven to 400 degrees.

2. Pat meat dry. Stir together allspice, 2 teaspoons salt and 1 teaspoon pepper in a small bowl. Rub all over meat.

3. Spread half of onions and half of garlic in a large dutch oven and arrange meat on top. Spread remaining onions and garlic over meat. Cover pot and bake in oven.

4. Turn meat over after one hour. Then return pot to oven for an additional 90 minutes until meat is very tender.

5. Skim fat from pan juices. Sprinkle meat and onions with parsley and serve.

Saturday, December 4, 2010

I outdid myself


A few photos from Thanksgiving 2010.


The menu was almost identical to last year's menu: orange-flavored sweet potatoes with oatmeal cookie topping, mashed potatoes with caramelized shallots, creamed spinach, sauteed Brussells sprouts with chestnuts, cranberry fruit conserve, and gravy made from homemade turkey stock. The only changes were to the turkey (I roasted a deboned and butterflied turkey breast and some drumsticks and wings instead of an entire turkey) and the stuffing (I made a cornbread, apple and sausage stuffing instead of one with apple, challah, and chestnuts).


It did feel absurd to have that much food for four people, but we had so many delicious leftovers!

Thursday, November 25, 2010

Happy Thanksgiving!

Good morning and happy Thanksgiving! I'm sitting on my couch watching the Macy's Thanksgiving Day Parade on television, which I can also hear out the window since we live only half a block from Central Park West, where the parade is proceeding south.


My sister also lives just off the parade route, on West 81st Street between Central Park West and Columbus, one of the two streets that are used as staging areas to inflate the famous parade balloons. In theory, only people who live on West 81st Street, and their guests, are permitted onto the north side of 81st Street. Everyone else has to walk along the much more crowded south side. Last night Kristy invited us over to share her balloon-viewing access. Given the crowds on the north side of the street, I find it hard to believe that the residents-only policy was being enforced too strictly by the NYPD, many of whom were happily snapping photos with the balloons themselves.


For pre-balloon viewing nourishment, Kristy served pizza (made during our class at Pizza A Casa and reheated on her pizza stone last night), a delicious prosciutto and mortadella ravioli which she'd picked up at Eataly, and a mixed green salad with shaved pecorino cheese, cherry tomatoes, and one of my favorite salad dressings: a brown butter and truffle oil vinaigrette. Here's the recipe for this super-rich dressing:

2 tablespoons unsalted butter
2 tablespoons sherry vinegar
2 tablespoons balsamic vinegar
2 tablespoons truffle oil
1/2 cup extra virgin olive oil
salt and pepper to taste

In a small saucepan, melt the butter over medium heat. Cook until it begins to turn a nutty brown color and the foam subsides. Remove from heat and let cool until room temperature, about 10 minutes. Meanwhile, in a bowl, combine the vinegars. Drizzle in the cooled butter and the oils, whisking until the dressing is well blended. Season with salt and pepper to taste.

I'll have a full report on our Thanksgiving dinner sometime this weekend.

Tuesday, November 23, 2010

best. bolognese. ever.


Hello long lost readers! I have been a very delinquent blogger lately and we have a lot of catching up to do. I'll start by sharing my favorite bolognese sauce recipe which is actually a hybrid of two versions of bolognese sauce from Mario Batali, one from "Molto Italiano," and another that I downloaded from the Food Network all the way back in 2000.

Ragu Bolognese

1/4 cup extra-virgin olive oil
4 tablespoons unsalted butter
2 medium onions, finely chopped
4 stalks celery, finely chopped
2 carrots, peeled and finely chopped
5 cloves of garlic, minced
1 lb ground beef
1 lb ground pork
1/2 lb ground veal
1/4 cup pancetta, ground in a food processor
1/2 cup whole milk
8 oz canned diced tomatoes
3 tablespoons tomato paste
1 cup dry white wine
1 teaspoon fresh thyme leaves
salt and fresh ground pepper

In a large heavy-bottomed pot, heat olive oil and butter over medium heat. Add onion, celery, carrots, and garlic and cook over medium heat until vegetables begin to soften, about 5 minutes. Add beef, pork, veal, and pancetta and stir until vegetables. Cook over high heat, stirring occasionally until all meat has browned, 15 to 20 minutes. Add milk and simmer until mostly reduced, about ten minutes. Add tomatoes, tomato paste, wine and thyme leaves. Bring to a boil and then lower the heat and simmer for at least two hours and up to two and a half hours, until you get the desired consistency. Season with salt and pepper.

This recipe yields more than 2 quarts (8 cups) of sauce. You'll only need 1/2 that amount for one pound of pasta. The rest can go right in your freezer.


I like to add a little of the pasta's cooking water to the sauce and add the pasta to the simmering sauce when it's still pretty al dente and finish cooking it in the sauce before adding lots of grated cheese.

Monday, November 1, 2010

roasted sweet potato and cauliflower curry


Sinus infection. Ugh. I prescribed myself something simple but spicy and made a roasted sweet potato and cauliflower curry inspired by the recipe on page 53 of "Moosewood Restaurant Simple Suppers," a fabulous cookbook full of flavorful but light and easy to make dishes, mostly of the vegetarian variety.

Serves 6

2 large or 3 small sweet potatoes, peeled
2 onions, peeled
1 head of cauliflower
1/4 cup olive oil
salt and pepper
1 13.5 oz can of unsweetened coconut milk
2 cups diced tomatoes
2 tablespoons peeled and grated fresh ginger*
4 tablespoons curry powder
salt and pepper

*a microplane grater is excellent for grating ginger

1. Preheat oven to 450 degrees.

2. Cut onions and sweet potatoes into 1" pieces and spread out onto a baking sheet. Drizzle with 1/2 the olive oil and season with salt and pepper. Toss the vegetables around on the baking sheet to make sure they are coated with the olive oil. Cut cauliflower into bite-size florets and spread onto a second baking sheet. Drizzle with remaining olive oil, season with salt and pepper, and mix to coat the cauliflower florets with the oil.

3. Place both baking sheets in the oven and roast vegetables for at least 20 minutes, maybe up to 25 or 30 minutes for the sweet potatoes and onions. You don't want them to burn, but you do want them to get browned and be fully cooked. Mix the vegetables around on the baking sheet after the first 10 minutes, and then every five minutes thereafter.

4. In the meantime, heat coconut milk, diced tomatoes, ginger, and curry powder in a large pot until just simmering. Season with salt and pepper.

5. When the vegetables are roasted to your satisfaction, turn off the heat on the curry sauce and add the vegetables. Stir to combine and season. Serve with rice or brown rice.

This curry is really not that spicy, (I did use a fairly mild store-bought curry powder though the Moosewood cookbook has a recipe to mix your own), but I will have to confirm that later this week when I can smell/taste things normally again.

Tuesday, October 26, 2010

Texas-style chili


Cool weather and college football got me craving chili. But, as you may recall, I have a phobia of industrial ground beef. So I decided to make it myself, using a recipe (from Tom Valenti's "Soups, Strews, and One-Pot Meals" - great cookbook) that calls for [ammonia free] cubes of beef stew meat. The result was delicious, especially when served with some brown rice and topped with grated cheddar cheese, finely chopped red onion, and a little sour cream.

Tom Valenti's Soups, Stews, and One-Pot Meals: 125 Home Recipes from the Chef-Owner of New York City's Ouest and 'Cesca

What you need:

2 lbs beef chuck, cut into 1-inch cubes
1 tablespoon garlic powder
1 tablespoon chile powder
2 tablespoons olive oil
2 carrots, peeled and diced
1 celery stalk, diced
1 medium onion, peeled and diced
2 bell peppers (I used one red and one green), seeded and diced
10 cloves of garlic, peeled and minced
2 tablespoons tomato paste
pinch of sugar
2 tablespoons all-purpose flour
1 tablespoon distilled white vinegar
1 quart beef low-sodium broth
1 cup diced tomatoes (I used canned - you can also use 4 fresh plum tomatoes)
1 teaspoon ground cumin
1 dried ancho chile,* seeded, stemmed and chopped
2 15 oz cans of red kidney beans, drained and rinsed
kosher salt
ground pepper

*I found a bag of ancho chiles Fairway, some chopped canned chipotle in adobo would also probably be good

What to do:

1. Put the meat in a bowl and season with one tablespoon of kosher salt, 1 tablespoon of ground pepper, the garlic powder and chili powder. Stir so the meat is covered in the spice mixture.

2. Heat olive oil in a large pot/dutch oven over medium-high heat. Add the seasoned meat and cook until browned all over, 8 - 12 minutes. Remove meat from the pot and set aside.

3. Add the carrots, onion, celery, peppers, and garlic and stir, scraping up any brown bits from the bottom of the pot. Cook over medium heat until the vegetables are softened, about 5 or 6 minutes. Add the tomato paste and punch of sugar and stir to coat the vegetables.

4. Return meat to the pot with the vegetables. Sprinkle flour over the meat and stir to keep it from browning.

5. Add vinegar and stir to loosen any additional brown bits from the bottom of the pot. Add beef broth to pot one cup at a time, stirring in between to prevent lumps. Add the tomatoes, cumin, and ancho chile and stir.

6. When the liquid comes to a boil, reduce heat and cover the pot. Cook for one hour.

7. Add beans and continue to cook over low heat for 15 minutes or until beans are tender.

Enjoy.

Sunday, October 24, 2010

Sunday school


Every weekday around 11:30am, I get a daily cooking/restaurant e-newsletter in my inbox from Tasting Table. The newsletters are usually pretty interesting, but one Tuesday in August, something in particular caught my eye: a pizza cooking school that promised to teach its students to make restaurant quality pizza from scratch in regular old home ovens. I had to enroll.


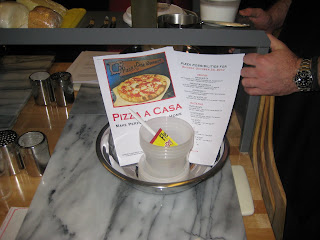
Today, my sister and our friend Kate spent 4 hours of intense pizza study (and sampling) at Pizza a Casa, Mark Bello's colorful pizza cooking school and "self sufficiency center," (you can buy everything you need to replicate his pizza from his shop at the front of the classroom, including a pizza stone, and imported san marzano tomato "passata") on the Lower East Side.


Mark is native to this neck of the woods and became determined to recreate a classic NYC thin crust pie (think Totonno's, Di Fara's, or Lombardi's) while attending graduate school in Chicago. After much trial and error, along with several stints as a pizzaiolo and a few years spent living in Italy, he has developed a fool-proof recipe for perfect pizza crust and technique to cook it in your home oven.


The classroom is set up with a long table in the center. Mark stands at the head, carefully explaining the fruits of his research and sharing his tips for dough, tomato sauce, toppings and baking. All tools and ingredients are provided, including a few locally-sourced products (e.g., cheeses from Alleva Dairy and the Essex Street Market) and not-so-locally sourced products (e.g., canned grilled eggplant, tomato sauce, and sea salt imported from Italy).


We started by each making our own dough, enough for four individual pizzas, with only a few simple ingredients: all-purpose flour (he swears by King Arthur's), yeast, some warm water, olive oil, and salt. That's it.


Mark gave us a demonstration on kneading the dough before we each tried our own hands at it. Once our dough had been sufficiently kneaded, divided, rolled into balls, and set aside to rise, the real fun began: eating the pizza.


Pizza number one: classic margarita made with local mozzarella, imported italian tomato "passata," graded pecorino cheese, finished with fresh basil and a drizzle of olive oil.


Pizza number 2 (my personal favorite): potato rosemary made with thinly slice red potato (pre-steeped in olive oil, salt, rosemary, and garlic) and pecorino and finished with fresh minced rosemary leaves and a drizzle of olive oil.


Pizza number 3: local smoked mozzarella, italian tomato "passata," pecorino, and sundried tomato, finished with fresh basil and balsamic vinegar. Pizza number 4 (which I forgot to photograph and which was the only pizza I didn't love): pizza bianca with fresh ricotta, fresh mozzarella, local butter, pecorino cheese, and roasted peppers, finished with lemon zest and freshly ground black pepper.


It was 2pm by this point and I hadn't had lunch, so despite Mark's warnings that we would "hit a pizza wall" sooner than we thought, I eagerly ate several slices of each of his sample pies, which I later regretted as I was felt quite sick by the time I had sampled each of the four pizzas I later baked.


We then turned to rolling out our now-risen balls of dough and each took a crack at forming crusts.


I found forming the crust to be the toughest part of the pizza-making process. But Mark and Jenny were right by our sides offering encouragement and showing us what to do if we ripped our dough, needed help getting the formed crusts on the wooden slips, or were ready to launch our pizzas into the hot ovens. I should mention that there were only 5 students at our class today even though the classroom can accommodate 12. So we really lucked out by having such a small class and getting so much individual attention.


Some students only made one or two pizzas and took their remaining dough home, but as I mentioned earlier, I ended up making all four of my dough balls into pizzas (most of which I ended up taking home with me):


quatro formaggi with a Vermont blue cheese, ricotta, pecorino, and mozzarella;


margarita with sopressata;


eggplant and roasted pepper; and a potato rosemary drizzled with black truffle oil (didn't take a picture of that one, but it was very pretty).


I had a really great time and I highly recommend Mark Bello's Pizza a Casa for delightful and informative afternoon of pizza making and eating. And he has just started teaching classes on making fresh pasta out of the same classroom, so I plan to enroll again soon.


Pizza a Casa
www.pizzaacasa.com
4 hour class: ~$150
371 Grand Street (between Essex and Norfolk)
(212) 228-5483

Sunday, October 17, 2010

Stuffed acorn squash


I thought I'd follow my last fall squash recipe with . . . ANOTHER fall squash recipe.

Today's recipe features acorn squash and is an adaptation of a recipe for "zucca al forno" that I saw Mario Batali make on his first cooking show, "Molto Mario," way back in 2001. While Mario probably knew what he was doing, I decided to use much less butter and cheese than he suggested (the man is quite rotund) and also to skip the mushrooms and bread cubes. The result: a very savory and satisfying squash preparation. And rich even with less butter and cheese -- Judd and I shared one half of one squash tonight and now have quite a lot of cheesy acorn squash in the refrigerator.

Here's what you'll need:

2 acorn squashes
1 tablespoon unsalted butter
1 onion, cut into fine dice
1 egg, beaten
1/2 cup grated parmesan cheese
8oz mascarpone cheese
1/3 lb grated gruyere cheese
1 teaspoon freshly grated nutmeg
salt and pepper

1. Preheat oven to 375 degrees.

2. Melt butter in small saute pan. Add diced onion and cook, stirred, until onion begins to brown. Season with salt and pepper and set aside to cool.


3. Cut cap off of acorn squash and cut in half down the center. Remove seeds and set each half in a large baking dish.

4. In a large bowl, mix egg, mascarpone, parmesan, gruyere, nutmeg, and browned onions. Season with salt and pepper.


5. Fill each squash half with a large spoonful (~1/4 cup each) of the cheese mixture. Bake for 90 minutes or until golden brown. Let cool for a few minutes before eating so you don't burn your mouth!

Serves 4 as a main course, and 8 as a side dish.

Monday, September 27, 2010

butternut squash soup

Can you believe that October starts at the end of this week!? For each year that I am not a student, the speed with which the summer passes me by gets more depressing. Thankfully, fall is my favorite season and butternut squash, one of my favorite foods, is everywhere you look.

In honor of autumn's arrival, I made a big pot of butternut squash soup yesterday. I make it so often that I don't really use a recipe anymore. But here is the gist, in case you'd like to make some too, with three delicious variations:

BASIC SOUP RECIPE:

2 tablespoons olive oil
one large butternut squash, peeled, seeded, and cubed
one large onion, chopped
6 cups chicken or vegetable broth/stock
salt and pepper

1. Heat oil in large pot. Add onion and cook until softened. Add butternut squash and stir to coat.


2. Add chicken/vegetable broth and bring to a boil. Cover pot and simmer over low heat for 25 minutes.

3. Remove soup from heat. Puree soup in batches in a blender or with an immersion blender (which I HIGHLY recommend if you don't have one). Season with salt and pepper.

THREE VARIATIONS

One: replace one cup of the broth with one cup of apple cider. While soup is simmering, sauté some sliced mushrooms in a little olive oil. When mushrooms are almost cooked, add some soy sauce to the pan. Stir mushrooms into puréed soup.


Two: while soup is simmering, cook one box of Uncle Ben's "original recipe" long grain and wild rice. When rice is cooked, stir in 1.5 tablespoons of truffle oil. Add cooked rice to puréed soup.

Three: add 1 tablespoon of minced fresh sage leaves to cooking onions when you add the diced squash in Step 1. Add 1/2 cup of grated parmesan cheese to puréed soup before serving.

Also in celebration of fall, I bought a "peck" of Empire apples (~30 apples) at an orchard in Red Hook this weekend which are currently being converted into applesauce in my kitchen. In cold months when berries are not in season, I like to mix a little applesauce into the greek yogurt I eat for breakfast every day.

Friday, September 17, 2010

jam making 101


My sister and I decided to try our hand at making our own jam last week. And it was quite an undertaking. In addition to procuring canning jars (which you buy at most hardware stores, but also Zabar's) and A LOT of fruit, we also had to get some special canning equipment including curved tongs (to remove the jars from boiling water), a special funnel (to get the jam into the jars), and a magnetic lid wand (so you contaminate the lids by touching them).
Williams-Sonoma Art of Preserving Cookbook
We relied heavily on Williams-Sonoma's "The Art of Preserving" for instructions and recipes. It's a great cookbook with recipes for both sweet and savory preserved food and also recipes that include preserved food as an ingredient. Over two days, we made their mixed berry preserves, plum blueberry preserves, and peach preserves. Once she got the basic formula down (fruit + lemon juice + sugar), Kristy also ad libbed a recipe for peach raspberry preserves.


There are many time consuming steps involved in making jam in addition to washing, cutting, sometimes peeling, and cooking fruit. For example, you need to sterilize the jars and lids before using them and then keep them warm in a large pot of simmering water so they won't crack when you fill them with the very hot jam. The canning lids also need to spend some time in a pot of simmering water before you place them on top of the jars, using the aforementioned magnetic wand. Once filled, the jars need to return to a pot of water to boil for ~20 minutes, then removed from the water and left to seal and cool on a rack. Once the jars reach room temperature, they can keep on a shelf for up to a year!


Our first batch of jam was problematic. We did not fill the jars high enough (in canning parlance, we left too much "headspace") and the lids never sealed. This innocent mistake required us to empty all of the jars, resterilize them, refill them, reboil them, etc. It was quite frustrating to say the least. Later batches went more smoothly.

If you have a big kitchen, a lot of free time, and and even larger amount of patience, I definitely recommend home preserving. It is a nice way to prolong your enjoyment of seasonal produce, though not inexpensive. In fact, it is undoubtedly cheaper to buy a jar of Smuckers than it is to make your own jar of strawberry jam. But much less satisfying.

For more information on canning, including a step-by-step illustrated tutorial, check out the website for Ball, the leading make of home food preservation equipment.